# Self-hosted Reverse Proxy
The FlyDog SDR Project offers free reverse proxy service for those who purchase FlyDog SDR, but users can also build self-hosted reverse proxy servers.
# Preparation and Requirements
To build a reverse proxy server, the user needs to do the following.
- Rent a cloud server (IP
1.2.3.4is used as an example) - Register a domain (this article uses
example.orgas an example)
In addition, there are the following requirements for the cloud server.
- The cloud server has at least 512 MB of RAM (this can be expanded by adding Swapfile)
- The cloud server has at least one public IP address
- The cloud server has a suitable traffic quota
In the following, the operation of the cloud server is based on CentOS as an example.
# Setting Up the Runtime
Login to the cloud server via SSH and install Docker.
[centos@flydog-server ~]$ curl -fsSL get.docker.com | sudo bash
[centos@flydog-server ~]$ sudo usermod -aG docker ${USER}
[centos@flydog-server ~]$ sudo systemctl enable docker
After installing and enabling Docker, restart the cloud server.
[centos@flydog-server ~]$ sudo reboot
Once the reboot is complete, reconnect to the server via SSH and install Git.
[centos@flydog-server ~]$ sudo yum install -y git
# Pull the Configuration and Build the Image
Pull the reverse proxy server configuration provided by the FlyDog SDR Project from GitHub to the user's root directory (this directory and the directory name cannot be changed).
[centos@flydog-server ~]$ git clone https://github.com/flydog-sdr/reverse-proxy ~/reverse-proxy
Build Frps, the server side of the reverse proxy tool used to interface with FlyDog SDR, which takes about 3-5 minutes to build.
[centos@flydog-server ~]$ docker build -f ${HOME}/reverse-proxy/docker/frps/Dockerfile -t frps:latest
# Customising the Configuration
Before deploying the application, some configuration changes are required, otherwise the application will return an error.
In the following command, example.org is the domain name to be written to the configuration file. This domain name is used by the Frp client (Frpc) to access the server and for guests to access the FlyDog SDR instance.
[centos@flydog-server ~]$ sed -i "s/YOUR_DOMAIN/example.org/g" `grep -lr "YOUR_DOMAIN" ${HOME}/reverse-proxy/*`
In addition, the user will need to modify the credentials used for the Frp client to log in to the server. The FlyDog SDR Project recommends using the UUID as the authentication credentials.
In the following command, c62868fd-5889-4904-8145-d57b5104cb64 is the credential required for the Frp client to log in.
[centos@flydog-server ~]$ sed -i "s/YOUR_UUID/c62868fd-5889-4904-8145-d57b5104cb64/g" ${HOME}/reverse-proxy/config/frp/frps.ini
# Deployment of Applications
Create a Docker bridge for communication between containers.
[centos@flydog-server ~]$ docker network create -d bridge reverse-proxy
Start by deploying Frps.
[centos@flydog-server ~]$ docker run -d \
 --hostname frps \
 --name frps \
 --network reverse-proxy \
 --restart always \
 --volume ${HOME}/reverse-proxy/config/frp:/etc/frp \
 frps:latest
PHP is then deployed.
[centos@flydog-server ~]$ docker run -d \
 --hostname php \
 --name php \
 --network reverse-proxy \
 --restart always \
 --volume ${HOME}/reverse-proxy/htdocs:/var/www \
 php:7.4-fpm-alpine
Lastly, deploy Nginx.
[centos@ip-172-26-19-76 ~]$ docker run -d \
 --hostname nginx \
 --name nginx \
 --network reverse-proxy \
 --publish 80:80 \
 --restart always \
 --volume ${HOME}/reverse-proxy/config/nginx:/etc/nginx \
 --volume ${HOME}/reverse-proxy/htdocs:/var/www \
 --volume /var/log/nginx:/var/log/nginx \
 nginx:stable-alpine
Check the container status, at this point all three containers should be in normal operation.
[centos@ip-172-26-19-76 ~]$ docker ps
CONTAINER ID   IMAGE                 COMMAND                  CREATED          STATUS          PORTS                               NAMES
d990b1839f13   php:7.4-fpm-alpine    "docker-php-entrypoi…"   33 seconds ago   Up 33 seconds   9000/tcp                            php
c0a8d3521340   nginx:stable-alpine   "/docker-entrypoint.…"   40 seconds ago   Up 40 seconds   0.0.0.0:80->80/tcp, :::80->80/tcp   nginx
023904ff1bea   frps:latest           "frps -c /etc/frp/fr…"   57 seconds ago   Up 57 seconds                                       frps
# Adding Domain Name Resolution
Add two records for the domain.
| Type | Name | Content |
|---|---|---|
| A | @ | 1.2.3.4 |
| A | * | 1.2.3.4 |
@ stands for the root domain, example.org.
* is a wildcard, matching *.example.org.
# Enable This Node
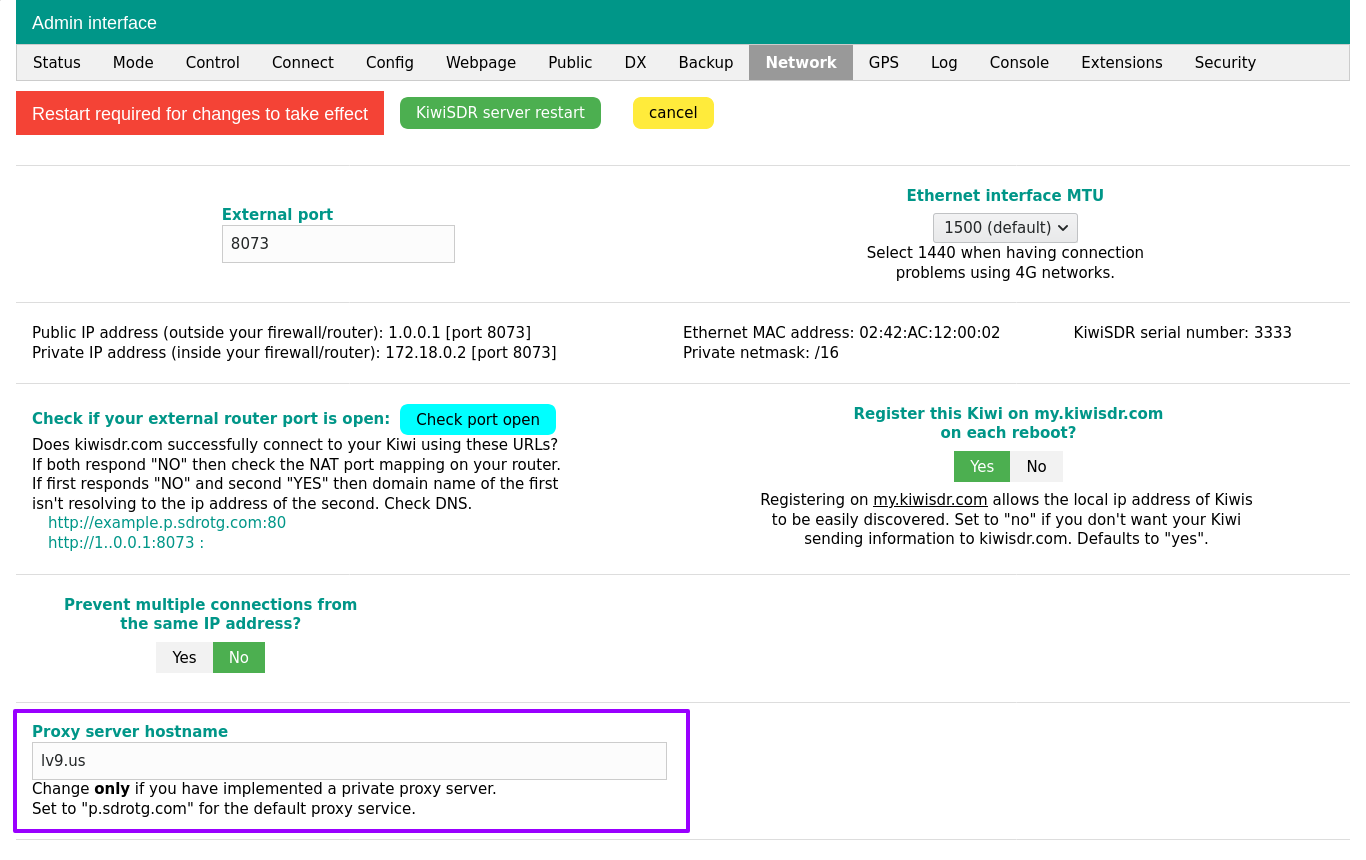
Go to the FlyDog SDR administration, go to the Network tab, change p.sdrotg.com to example.org in the Proxy server hostname form, and restart the FlyDog SDR application according to the system prompt.

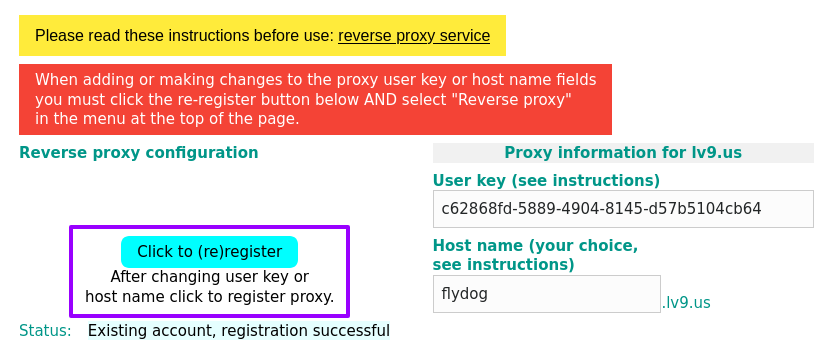
Once the reboot is complete, go to the FlyDog SDR administration again, go to the Connect tab and fill in the new reverse proxy information in the Reverse proxy configuration form.
Click Click to (re)register and wait for the page to return Existing account, registration successful.

Scroll to the top half of the page, check Reverse Proxy again to update the reverse proxy settings and restart the application again as prompted.
Once the restart is complete, you will be able to access it using the new address, e.g. flydog.example.com.
