# Administration
After launching FlyDog SDR, the site information will be the default state and will need to be modified by the user.
# Login to Administration
To login to the administration, simply add /admin to the address you are visiting.
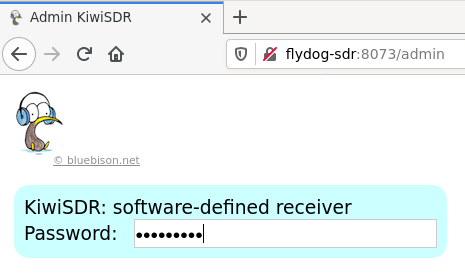
Using flydog-sdr:8073 as an example, to get to the administration, the URL would look like this.
http://flydog-sdr:8073/admin
After entering the default password flydog-sdr for the admin login, press Enter to login to the administration.
# Change Default Password
Since the initial password for the FlyDog SDR administration is flydog-sdr, it can be easily hacked, so you should change the default password after logging into the administration.
Switch the tab to Security and change the default password in the Admin password section to a different password, as shown here.
For tips on how to set a password, see the article: BBC: How to pick the perfect password (opens new window)
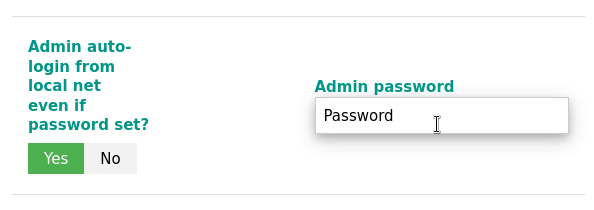
After changing the password, press Enter to take effect.
The next time you log in to the FlyDog SDR administration, please use the new password.
# Set User Password
If you do not want to make your SDR site public, but only share it with friends, you can set a user password for the site.
Switch the tab to Security and enter a guest password different from the administration password in the User password field and press Enter to save, as shown in the image.
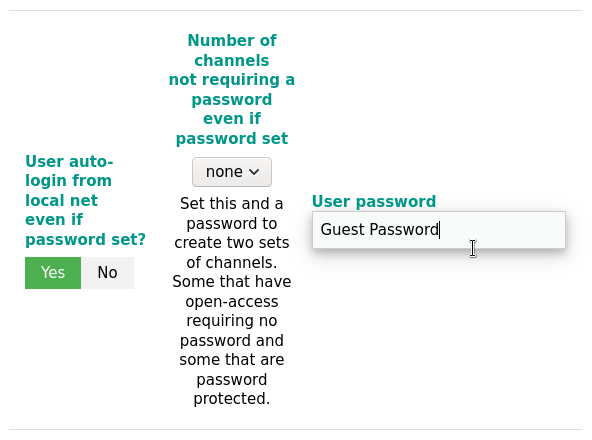
From now on, when other users access this SDR site, they will need to enter the user password before they can use it.
The user password is not a administration password, so you can tell this password to others.
# Select FPGA modes
The FlyDog SDR offers 4 FPGA modes, so you can choose the right one to suit your needs.
Switch the tab to Mode, select the FPGA mode and follow the instructions on the page to restart the application.
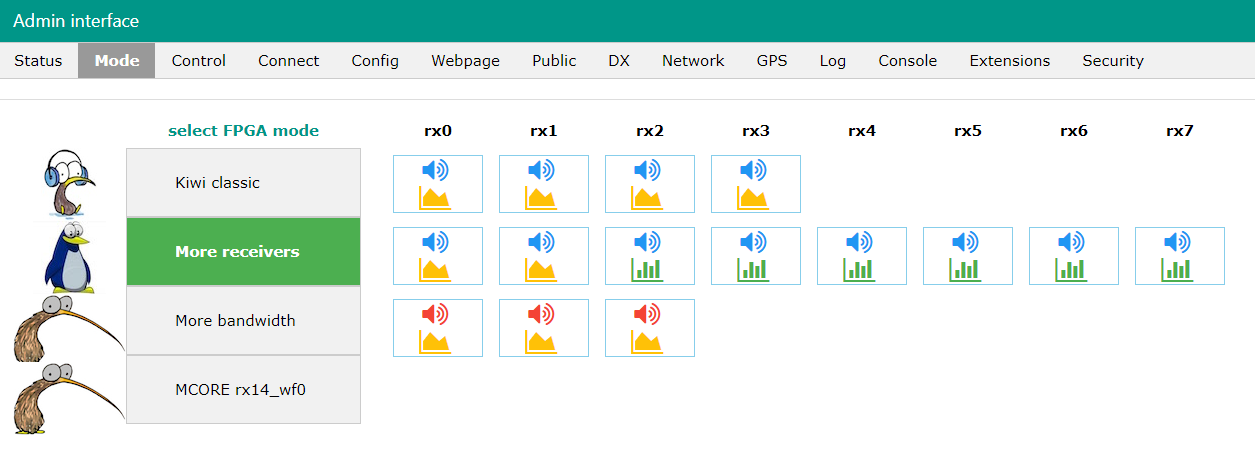
The different FPGA modes have their own characteristics, the general differences are as follows.
| FPGA mode | Spectrum channels | Audio channels |
|---|---|---|
| Kiwi classic | 4 | 4 |
| More receivers | 8 | 2 |
| More bandwidth | 3 | 3 |
| MCORE | 0 | 14 |
# Control FlyDog SDR
By switching the tab to Control, the user has simple control over the FlyDog SDR, such as restarting the FlyDog SDR, forcing users to go offline, etc.
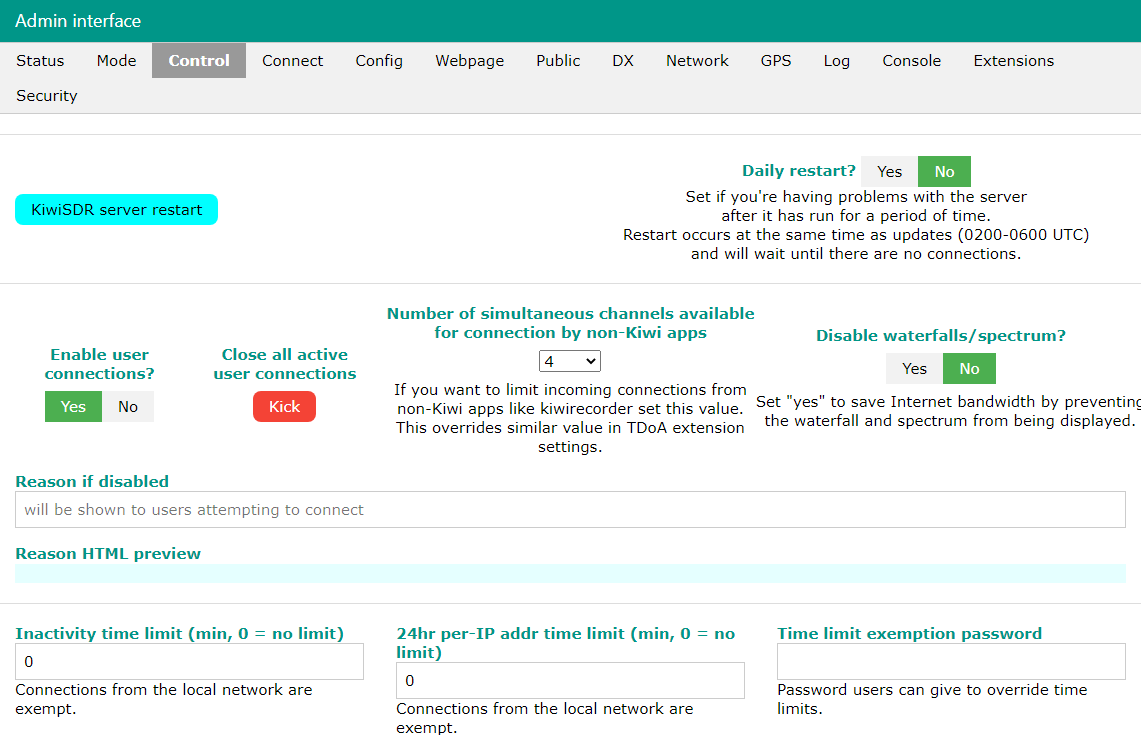
- KiwiSDR server restart: restart the application
- Daily restart: When set to Yes, the server will be restarted daily
- Enable user connections: when set to No, FlyDog SDR will reject any incoming connections
- Close all active user connections: force all users connected to FlyDog SDR to go offline
- Number of simultaneous channels available for connection by non-Kiwi apps: the maximum number of connections allowed for third party apps
- Disable waterfalls/spectrum: disables spectrograms
- Reason if disabled: when Enable user connections is set to No, shows the user the reason why the site is down, can use HTML tags
- Inactivity time limit: time limit for incoming users, 0 is no limit
- 24hr per-IP addr time limit: time limit for incoming IPs, 0 is no limit
- Time limit exemption password: password to bypass the time limit
# Externally Connect to FlyDog SDR
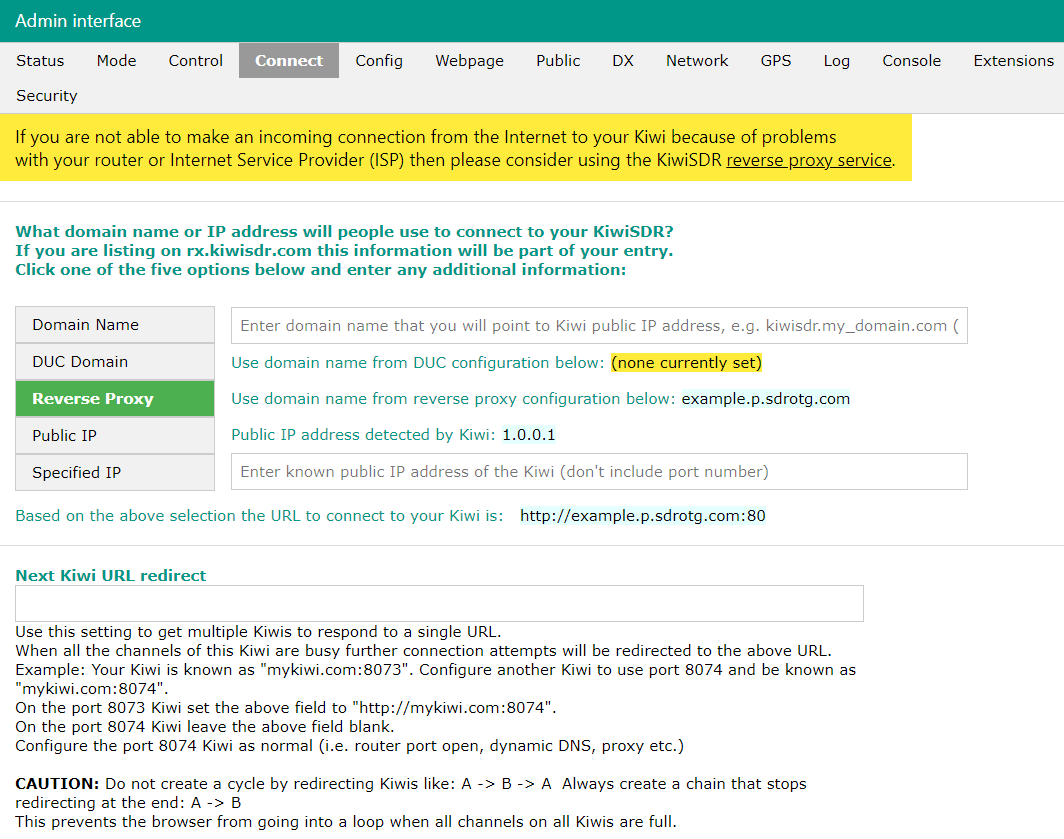
There are several ways to connect to the FlyDog SDR externally, but the different ways also require the user to be on a different network.
Switching the tab to Connect allows the user to specify the relevant method of access to the FlyDog SDR, and the user can set up various ways of accessing the FlyDog SDR.
For more information and instruction on how to open FlyDog SDR to the public network, please refer to next chapter (opens new window).
# Modify Initialisation Parameters
Switching the tab to Config allows the user to modify the relevant initialisation parameters according to local conditions. This parameter also determines the default settings that FlyDog SDR presents to the user when a new connection is passed in.
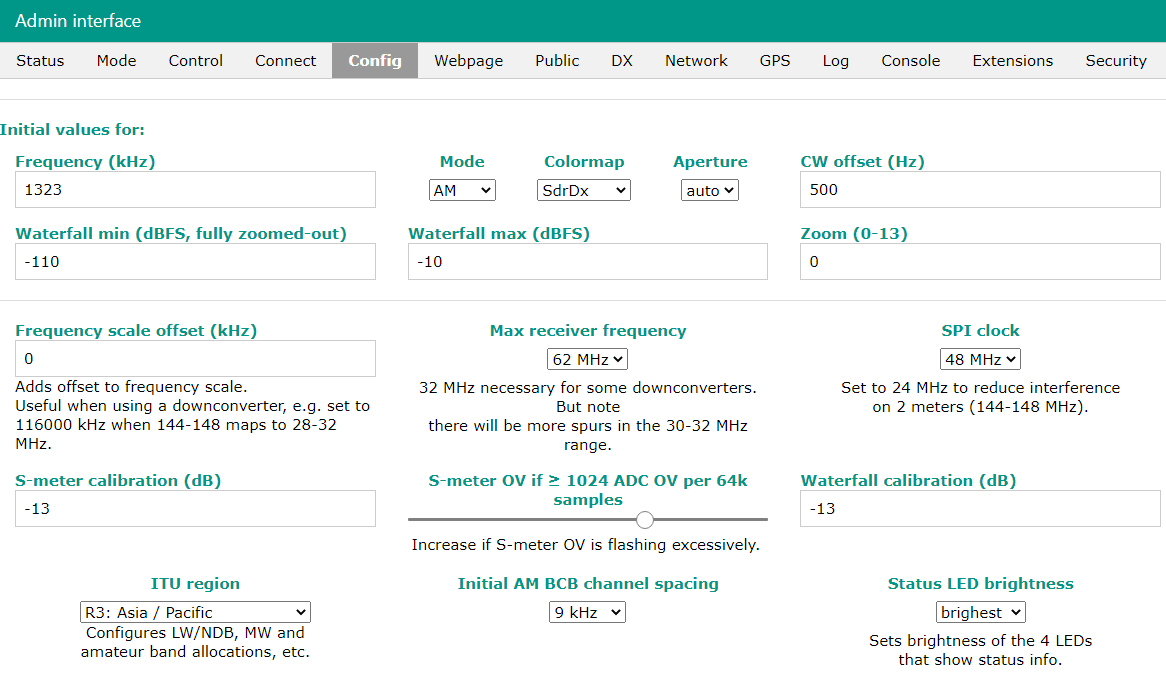
For normal users, the following values can be changed.
- Frequency (kHz): initial frequency
- Mode: Broadcast mode (AM, SSB, CW, etc.)
- Colormap: colour scheme of the spectrum map (set according to your preference)
- Max receiver frequency: the frequency range received by the FlyDog SDR (up to 62 MHz)
- ITU region: ITU region (according to the user's country)
- Initial AM BCB channel spacing: Medium wave step unit (9 kHz, 10 kHz)
# Modify Site Information
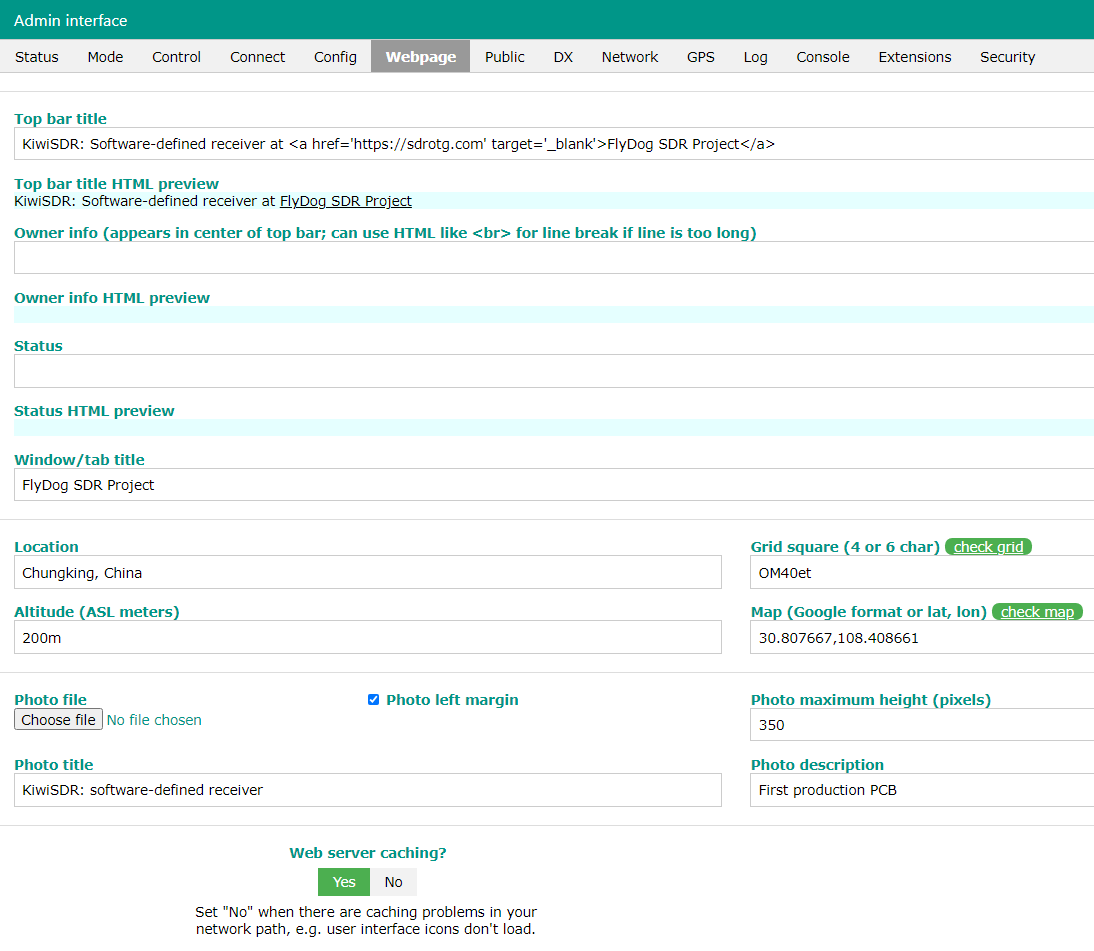
The Webpage tab allows the user to modify the information that the site displays to visitors when they visit the site.
Some forms can use HTML tags (e.g. hyperlinks) when modifying information.
- Top bar title: the main title of the page, you can use HTML tags
- Owner info: information about the administrator, HTML tags can be used
- Status: Site status, located in the dashboard tab, HTML tags can be used
- Window/tab title: browser title
- Location: site location
- Grid square: coordinates of the Maidenhead grid
- Altitude: altitude, set automatically by GPS
- Map: site coordinates
- Photo file: photo uploaded by the user
- Photo maximum height: the maximum height of the photo, in pixels (px)
- Photo title: photo title
- Photo description: description of the photo
# Check Serial Number
If there is a problem with the device during use and you need to contact the after-sales service, please provide the unique serial number assigned to the FlyDog SDR at the time of sale.
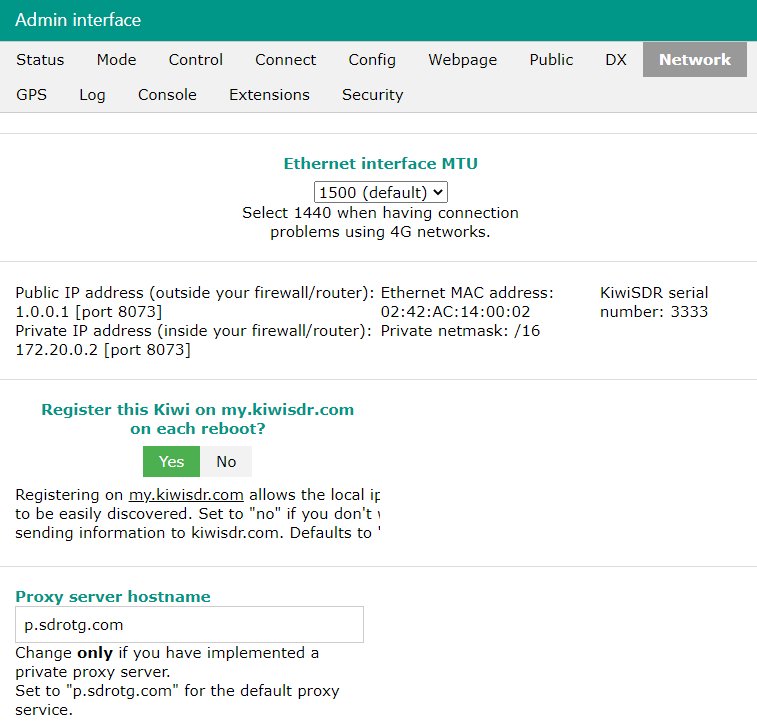
The serial number can be obtained in the administration page.
Switch the tab to Network and locate the four digits after the KiwiSDR serial number, which is the serial number of the FlyDog SDR device.
